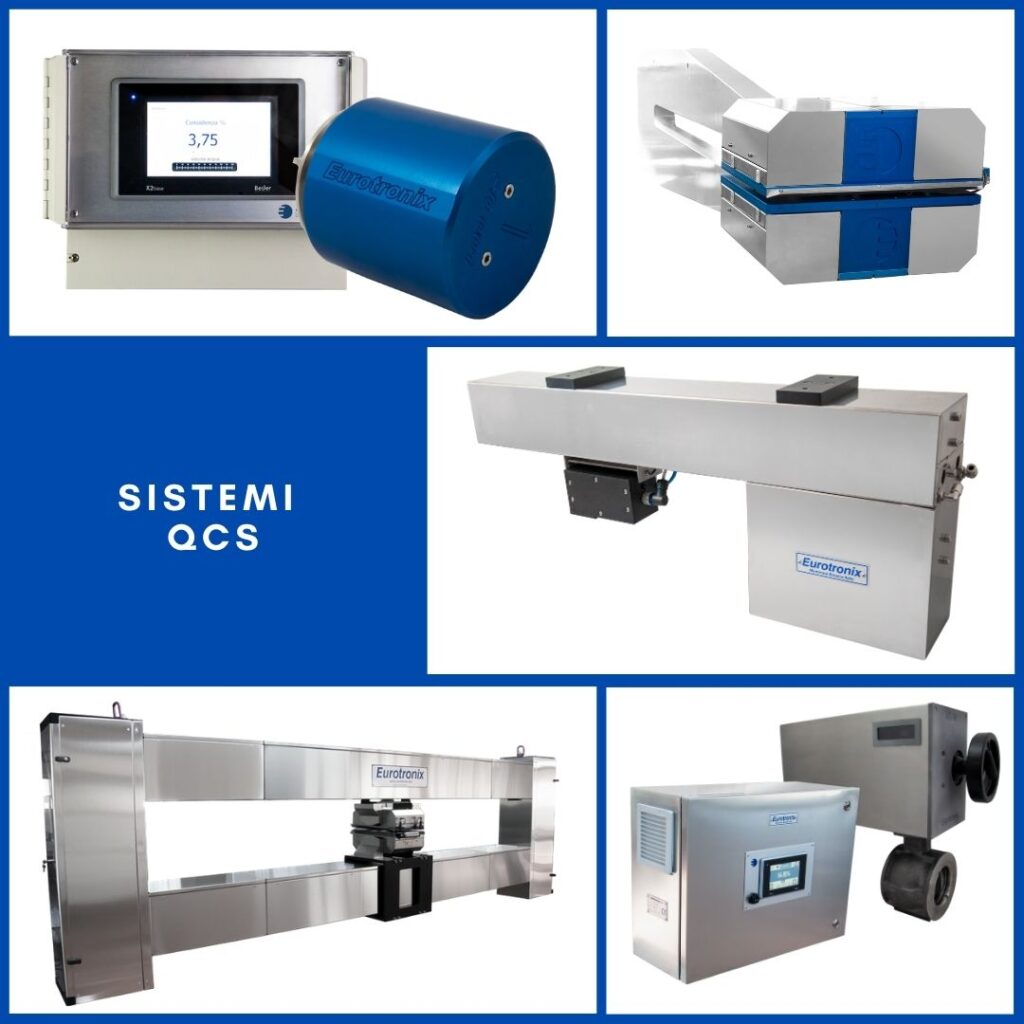
The following is a brief overview of our Sensor Group for QCS systems. We provide the customer with a wide range of functions and models to actively respond to line requirements. Our Sensor Group for QCS can be applied on any machinery, ensuring ductility, performance and reliability in terms of measurement.
We currently implement the following sensor assembly for QCS:
- Grammage Sensor
- Radiative Source Sensor
- Measurement sensor
- Moisture sensor
- 3D Sensor
- Sensors Autocalibration System
In the description below you will find technical and implementation details for each of the QCS Sensors. For further information, please refer to our Sales Manager and our Technical Department at “Contacts“
- Basis Weight Sensor
- Radioactive Source Sensor
- Measurement Sensor
- Moisture Sensor
- 3D sensor
- Sensor Self-calibration
Basis Weight Sensor
| Basis Weight Range | 180/350 gr/sqm |
| Accuracy | +/- 0,1 gr/sqm |
| Repeatability | +/- 0,1 gr/sqm |
| Distance between measuring heads | 10 mm |
| Employed source | KR85 200 mCi |
| Working temperature | 20° -90° C° |
| Compensation | Z, Temperature |
Radioactive Source Sensor
It consists of a circular container, part cast alloy and part chrome-plated brass. Inside, the source is arranged in a special block made in such a way as to prevent it from escaping, even in the event of impact or mechanical accident or violent fire (melting limit temperature and no danger of contamination 1,300° C).
A source block shutter consisting of soft and hard layers of alloy material is provided, which ensures 95% interception of radioactive emissions in the closed state.
A second shutter consisting of a stable sample is inserted for self-calibration of sensitivity.
The control mechanism of the shutter is achieved by an electromagnet system, which guarantees perfect closing operation even in the event of a power failure. Two limit switches at the end of the source closing flag signal the open-closed status of the shutter.
The system still allows external intervention on the opening and closing mechanism of the source. The entire emitter assembly is thermostabilised and is normally adjusted to approximately +10°C of the temperature of the paper being measured. The collimator hole of the beam emitter is protected by a membrane, made of thin material, but of very high mechanical resistance.
A thermoregulated air jet ensures the cleaning of the protective membrane.
The connections are made with screw couplings, gold-plated contacts of MIL grade and the housing is enclosed in a protective hood.
Measurement Sensor
It consists of a circular housing, part cast alloy and part chrome-plated brass. Inside is the ionisation chamber and microprocessor electronics for signal conversion with sigma/delta filter and CanBus communication. All electronic components are guaranteed up to a temperature of 125°. The receiving hole is protected by a membrane made of thin material with very high mechanical resistance.
A thermoregulated air jet ensures the cleaning of the protective membrane. The entire unit is maintained at temperature by a sophisticated thermostabilisation system (+/- 1°C) and is normally adjusted to approximately (+10°C) relative to the temperature of the paper being measured.
Moisture Sensor
| Measuring Principle | Low Frequency |
| Measuring Range | 2-12% of absolute H2O |
| Accuracy | +/- 0,1 absolute |
| Repeatability | +/- 0,1 absolute |
| Working Temperatures | 20° - 90° C° |
Measuring Principle
It utilises the property of water to absorb electromagnetic waves at certain frequencies. The dielectric generated by the moisture contained in the paper is measured at a fixed frequency. This value is then converted into an analogue signal with 24-bit resolution.
Sensore 3D
| Power supply | 24 VDC |
| Interface | CanBus |
| Measurement Range | 5-25 |
| Repeatability | +/- 10 micron |
| Accuracy | +/- 10 micron |
| Sensor Type | Magnetic |
| Working Temperature | 20° -90° C° |
Measuring Principle
It measures the magnetic field generated by a permanent magnet to provide the Z-indication of the position of the top and bottom plane.
Sensor Self-calibration
The sensors are equipped with an intelligent auto-calibration system that takes into account machine stops, start-ups, breakages and deviations from zero values to program calibration times. The basis weight sensor is equipped with a sensitivity autocalibration system that uses a stable sample.

